Image: Shutterstock
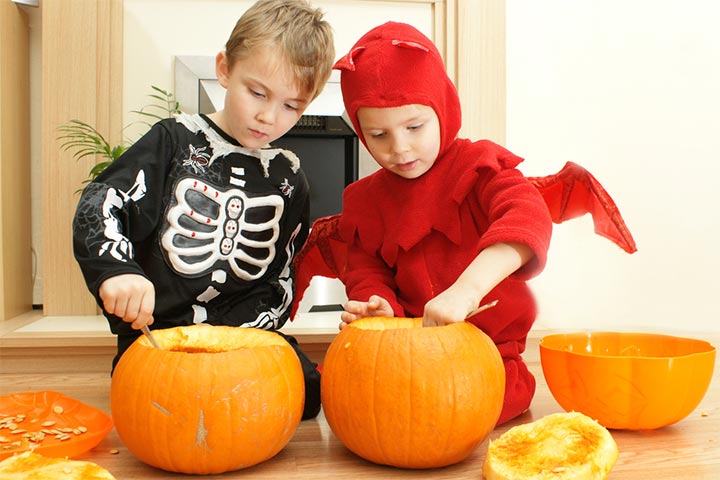
Pumpkin carving is an activity you cannot overlook at Halloween. It represents the spooky spirit of Halloween and gives your house the vibe the season needs. It is also a great way to bring everyone in your family together to make something creative.
While adults find it easy to carve a pumpkin, it can be quite a challenge to come up with ideas that include the children of your family. We bring you some easy pumpkin carving ideas for kids that they will enjoy doing.
These ideas will give your children a sense of accomplishment and boost their self-confidence while also bringing out their imaginative and creative side and improving their motor skills.
25 Pumpkin Carving Ideas For Kids
Carving a pumpkin provides different sensory experiences to children. You could also use this time to let older children in the family team up with the younger ones and increase the bonding and teamwork between them.
1. Pumpkin monsters
These pumpkin monsters look terrifying in a fun way and are very easy to make. You can make them with any pumpkin, though large and smooth pumpkins are best.
You will need:
- Pumpkins
- Paper
- Plastic ball ornaments
- Paint
- Hot glue
- Tape
- Marker
- Craft foam
- Needle tool
- Knife and scoop
- Gouge or power etching tool
How to make:
- Get a few pumpkin decoration stencil patterns off the Internet and print them out.
- Clean out the pumpkin. Remove all the seeds and strings.
- Tape your patterns onto the pumpkins using a needle tool. Punch the holes closely along the lines.
- Remove the paper and remove the skin of the pumpkin using a power etching tool or gouge. Scrape gently to remove the green rind and reveal the light-orange colored rind below.
- Cut the mouth and the teeth using a knife.
- Paint plastic ball ornaments and stick craft foam on them to make the eyes.
- Use hot glue to attach them to the pumpkin.
- You may use snake gourds for the arms and other decorative items or vegetables to make the nose and ears.
2. Vampire pumpkins
What better way to bring in the spooks than by displaying a pumpkin vampire on your doorstep? This extremely simple pumpkin carving idea is spooky yet fun.
You will need:
- Pumpkin
- Glow-in-the-dark teeth
- Knife
- Craft foam
- Hot glue
How to make:
- Measure the height and width of the glow-in-the-dark teeth and mark the measurements on the pumpkin.
- Clean out the pumpkin and remove the seeds and fibers.
- Cut a mouth-shaped hole using a knife. This hole should be a bit bigger than the height and width of the teeth.
- Using hot glue, attach the teeth in the appropriate place.
- Use craft foam to make the eyes and the nose for the pumpkin. Attach them using hot glue.
3. Flower pumpkin
Use various flowers, petals, and leaves to make a unique and beautiful pumpkin on Halloween. This pumpkin is extremely easy to make, and you can take creative liberties.
You will need:
- Pumpkins
- Pinecone petals
- Dried leaves
- Fake flowers
- Knife
How to make:
- Cut and clean the pumpkin, removing the seeds and strings from within.
- Cut holes for the eyes, nose, and mouth in any shape you want.
- Loop in two fake flowers for the eyes.
- Arrange other items artistically and decorate the beautiful pumpkin.
4. Thumbs-up pumpkin
This is another easy pumpkin carving idea for kids. All you need to do is trace and cut it.
You will need:
- Pumpkin
- Paper
- Needle tool
- Knife
- Tape
- Gouge or power etching tool
How to make:
- Clean the pumpkin thoroughly.
- Print out a thumbs-up stencil off the Internet.
- Tape the paper on the pumpkin and mark the shape by puncturing holes using a needle tool.
- Cut out the shape of the palm and scrape out the peel to form the outlines for the fingers.
5. Lite-Brite pumpkin
If you have a toddler who wants to participate in the carving, this pumpkin carving idea is the perfect solution.
You will need:
- Pumpkins
- Lite-Brite kit
- Scraper
- Skewer or spoon
- Flashlight
How to make:
- Clean out the pumpkin and scrape the side you want the face to be.
- Using a skewer or the end of a thin spoon, punch out holes for the eyes, nose, and mouth.
- Push the lite-brite pieces into each hole. You can use particular colors for different parts.
- Put a flashlight inside your completed pumpkin.
6. Owl pumpkin
Make an adorable owl this Halloween to spook others. It is a perfect idea if you have younger children.
You will need:
- Pumpkin
- Cardstock in black and orange
- Glue
- Scissors
- Knife
How to make:
- Clean the pumpkin.
- Get an owl stencil from the Internet or carve silly shapes for the eyes, nose, and mouth.
- Cut cardstock for the ears and wings. Stick orange and black pieces together to give depth to the parts.
- Glue them to the pumpkin or attach them with pins.
7. Melted crayon pumpkin
Making a melted crayon pumpkin is super easy and fun. You may experiment with this idea even if your children are young.
You will need:
- Pumpkin
- Crayons
- Tacky glue
- Hairdryer
- Exacto knife (optional)
- Garbage bag (optional)
How to make:
- Remove the paper off the crayons.
- Break the crayons in half.
- Glue the crayons on the pumpkin. Let the glue dry completely.
- Place the pumpkin in a garbage bag.
- Use a hairdryer on a low setting to melt the crayons. Use the low setting so that you can direct the flow of the melted crayons.
- You can use multiple colors or specific combinations of crayons for melting. You can also combine two or more colors to make new colors.
8. Candy holder pumpkin
This is a unique and functional pumpkin carving idea that young children can easily make. You can use both real and faux pumpkins for this idea.
You will need:
How to make:
- Clean the pumpkin thoroughly.
- If you are using a faux pumpkin, make sure you sand down all rough edges.
- Paint the eyes and the mouth using chalk paint. Let dry.
- Mark a circle on top of the pumpkin and cut it.
- Write a message (“Happy Halloween!” “Take a candy!” etc.) with chalk and fill the pumpkin with candy.
9. Galaxy pumpkin
This art idea is popular among children because they get to paint a pumpkin with their favorite concept of the galaxy. They can paint the sun, moon, stars, planets, aliens – anything they think is up there.
You will need:
- Pumpkin
- Acrylic paints
- Black spray paint
- Round foam sponge brush
- Small paintbrush
- Toothbrush
- Glitter nail polish (optional)
How to make:
- Paint the entire pumpkin in black using black spray paint. Let dry.
- Dab some acrylic paint on the surface with the round foam sponge brush.
- Use the same brush and dab other colors on different areas of the pumpkin. It is okay if the colors overlap.
- Dip the toothbrush bristles in white paint and hold it such that the bristles face the pumpkin.
- Run a finger through the bristles and flick the paint onto the surface.
- Let the whole thing dry completely.
- Add other details, such as the moon and planets, using other paints and a small paintbrush.
- You can add extra sparkle by applying glittery nail polish dots in places.
10. Glittery pumpkin
If you want your pumpkin to shine quite literally, you can add some jewels along with glitter. It is sure to dazzle everyone’s eyes and make you a star in your neighborhood.
You will need:
- Pumpkin
- Faux jewels
- Glitter
- Glue
- Water
- Paintbrush
- Bowl
How to make:
- Mix equal quantities of glue and water in a bowl.
- Apply it on the surface of the pumpkin using a paintbrush.
- You may add the glue in parts so that it does not dry up.
- Stick the jewels and apply glitter liberally on the sticky surface.
- Let dry completely.
- You may choose a pattern for decoration or simply apply them in an abstract manner.
11. Farm animal pumpkin
You can create a calm barnyard scene with this easy pumpkin carving idea. This is a project that your family will love doing.
You will need:
- Large pumpkin
- Small gourds
- Felt
- Craft foam
- Knife
- Paints and brushes
How to make:
- Clean out a pumpkin.
- Paint the outside of the pumpkin in the colors of your choice.
- Cut out a rectangle for the door of the barnyard.
- Make small barn animals using the small gourds. Use craft foam and felt to create the faces of the animals.
- Place them inside the large pumpkin and place it at your front door.
12. Diorama pumpkin
This is similar to the barnyard pumpkin project. Here, your children can create different scenes using their imagination.
You will need:
- Pumpkins
- Knife
- Items to create a diorama – plastic animal figurines, dried leaves, moss, grass, flowers, etc.
How to make:
- Cut and clean a pumpkin.
- Cut out a shape of your child’s choice on one side of the pumpkin. The size of the shape should be large enough to allow your children to place things inside without difficulty.
- Let your children add items of their choice to create a diorama.
13. Cookie-cutter pumpkin
These adorable pumpkins are simple and look so pretty you might want to gobble them up. They will keep your children busy for quite some time, and you will have a whole lot of carved pumpkins.
You will need:
- Small pumpkins
- Cookie cutters
- Mallet
How to make:
- Clean out the pumpkins.
- Let your children choose the cookie cutters of their choice.
- Place them on the desired spot on the pumpkin and use a mallet to cut through the rind.
- Make sure your children do not hit the pumpkins too hard.
- Put in some fairy lights and leave them on your doorstep for some adoring glances from passersby.
- You can even paint the pumpkins in the colors of your choice.
14. Surprised pumpkin
Surprised, shocked, or spooked? You decide what expression your pumpkins
should make.
You will need:
How to make:
- Clean out a pumpkin thoroughly.
- Using a knife, cut out two small circles for the eyes and one large circle for the mouth.
- You can fill the pumpkin with candy or simply light them up and put them in your front yard.
15. Honeycomb pumpkin
This is an idea that will unleash your children’s creative sides. You can make it as simple or as complex as you want, and it will still look fabulous.
You will need:
- Pumpkin
- Knife
- Yellow paint and paintbrush
How to make:
- Clean out the pumpkin, and using a knife, trace interconnected honeycomb-like hexagons on the surface.
- You can make as many or as few hexagons as you like.
- Cut some out and paint the others in yellow.
16. Cookie monster pumpkin
Children will love making this small and cute cookie monster pumpkin. It is super easy to make and is a lot of fun.
You will need:
- Small craft pumpkins
- Ping pong balls
- Markers
- Paints
- Glue
- Glow stick
How to make:
• Paint the pumpkin in the color of your choice. Let dry.
• Cut out a silly shape for the mouth and smooth out the rough edges.
• Draw pupils on the ping pong balls with markers and stick them to the pumpkin.
• Drop in a glow stick and display your little cookie monster pumpkin with pride.
17. Lollipop pumpkin
Do you want to make a unique pumpkin that is functional? This easy-to-make lollipop pumpkin is the answer you might be looking for.
You will need:
- Pumpkin
- Lollipops
- Knife
- Needle tool
How to make:
- Clean out a pumpkin thoroughly.
- Cut out simple shapes for the mouth, eyes, and nose.
- With a needle tool, punch holes on the top to place lollipops.
- Put in the lollipops.
- Now your pumpkin has lollipop hair and looks adorable.
18. Marble painted pumpkins
If you have seen a manicure video, you know what marble painting with nail polish is. You simply have to recreate the process with small pumpkins.
You will need:
- Small pumpkins
- White spray paint
- Nail polish in different colors
- A small bucket that can hold your pumpkin
- Water
- Toothpicks
- Q-tips
- Gloves
- Wax paper and cardboard or foam board
How to make:
- Paint a pumpkin using white spray paint. Let dry.
- Fill the bucket with water. The water should be at room temperature for best results.
- Wear gloves.
- In a ventilated room, pour the nail polish colors into the water. Keep the nail polish brush close to the water so that the nail polish floats on the surface and doesn’t sink.
- Add all the colors you need quickly.
- Use a toothpick to draw lines or patterns on the nail polish.
- Hold the pumpkin by the stem and submerge it entirely in the water. Make sure you put the side of the pumpkin inside the water first, or most of the color will stick to the bottom of the pumpkin.
- Roll the pumpkin in the water and cover it with nail polish completely.
- Remove it. Keep a Q-tip ready to wipe off any excess polish.
- Dry the pumpkin on wax paper placed on cardboard or foam sheets.
- You may cut out shapes for a face on the pumpkin or simply display it on your doorstep.
19. Glow-in-the-dark pumpkins
Glow-in-the-dark pumpkins look beautiful not only at night but also during the day. Simply draw lines, and still, your pumpkin will be the most awesome one in your neighborhood.
You will need:
- Real or faux pumpkins
- Black or white spray paints
- Glow-in-the-dark paints
- Blacklight (optional)
- Pencil
- Knife
How to make:
- Spray paint your pumpkin with white or black spray paint. Let dry.
- Sketch your design onto the pumpkin lightly with a pencil.
- Use the glow-in-the-dark paints to decorate the pumpkin over the pencil sketch. Keep a damp paper towel nearby to correct mistakes quickly.
- Place a blacklight nearby to show the full effect of the glow-in-the-dark paints in the dark.
- You may use Q-tips and toothpicks to tease the paints into different shapes as well (create waves, zigzags, etc.).
20. Cheese pumpkin
This is a simple idea that will turn your average pumpkin into a mouse-themed one. It is great for young children as they can easily cut these shapes and display the pumpkin.
You will need:
- Pumpkins
- Pencil
- Plastic rats
- Hot glue
- Knife
- Dried leaves
How to make:
- Trace out circles of different sizes on the pumpkin with a pencil.
- Cut out the holes.
- Use hot glue to attach the plastic rats in some of these holes in different positions. It will now look like Swiss cheese with holes that rats love.
- Scatter some dried leaves around the pumpkin, place some plastic rats on the ground as well, and your cheese pumpkin is ready for display.
21. Cat pumpkin
If your family loves cats, this idea might appeal to you. You can make a cat pumpkin and name it after your family cat.
You will need:
- One big round pumpkin
- One small pumpkin (to make extra parts)
- Knife
- Toothpicks
- Pencil
How to make:
- Clean the bigger pumpkin by removing all the seeds and strings.
- Draw the face of a cat on the pumpkin with a pencil. Do not forget to add whiskers.
- Cut two small triangles from the smaller pumpkin for the ears and small circles for the feet.
- Cut out the traced shapes and attach the ears and the feet using toothpicks.
22. Peekaboo pumpkin
A smaller pumpkin inside a bigger pumpkin doubles the spookiness quotient. This pumpkin carving is unique and easy to make, even for young children.
You will need:
- One large round pumpkin
- Two small pumpkins
- Plastic eyeballs
- Plastic skeleton arms
- Wooden skewers
- Serrated knife
- Hot glue
How to make:
- Cut off the top half of the larger pumpkin and hollow it out.
- Cut two holes for the arms on the lower half.
- Take one small pumpkin and cut out holes for the plastic eyeballs.
- Press the eyeballs in and carve a mouth.
- Place the lower half of the bigger pumpkin on a flat surface and place one small pumpkin inside it for the body and the one with the face above it.
- Secure them with wooden skewers and hot glue.
- Insert 3-4 wooden skewers on the rind of the lower half of the bigger pumpkin.
- Place the top half of the pumpkin on these skewers and press gently.
- Insert the skeleton arms in the holes provided and secure them with hot glue. Place them in such a way that it looks like a skeleton (or alien) is lifting its upper cover to see what’s outside.
23. Mummy pumpkin
This is another super easy but super spooky pumpkin you can make with children. Most children are interested in mummies, so they will be happy to do this.
You will need:
- One large pumpkin
- Googly eyes
- Bandages
- Glue
How to make:
- Glue the googly eyes on the pumpkin using glue.
- Bandage the pumpkin completely, except for the eyes
- That’s it! Your mummy pumpkin is ready.
24. Rainbow pumpkin
No matter how old your children are, they will love decorating this pumpkin.
You will need:
- Pumpkin
- Acrylic colors
- Paintbrush
- White spray paint
- Knife (optional)
How to make:
- Paint a pumpkin with white spray paint. Let dry.
- Starting at the top, paint acrylic colors with a paintbrush in short, flat strokes.
- Let it dry completely and
- Display it as it is.
25. Kawaii pumpkin
These cute pumpkins will melt your heart. They are super adorable and easy to make that you will look for reasons to make more.
You will need:
- Mini pumpkins
- White spray paint (optional)
- Acrylic paint
- Paint pens or markers
- Cardstock, scissors, and glue (optional)
How to make:
- Paint a mini pumpkin with white spray paint. Let dry.
- Next, paint it with an acrylic color of your choice. Let dry.
- Draw different faces, such as emojis, with the paint pens.
- If you want to add details such as leaves or pink cheeks, cut out cardstock of the desired color and use hot glue to attach it to the pumpkin.
These simple and fun pumpkin carving ideas for kids are sure to be an instant hit in your family. You can create some valuable bonding time with all the members of your family as you all come together to decorate the pumpkins.
Watch your children’s imagination soar and creativity develop as they come up with novel ideas to make their pumpkins spooky or glittery.
